
Balthazar in-game Character Destruction (not-final) using FlyApart Tool. Character Animation by Brian Walter:
FX FlyApart Tool
Quick
Description:
This tool is used to fake physics on objects to
be destroyed, instead of Maya's collision based simulation tools. It's
not a replacement, but a faster alternative when you need something simple.
The goal here is to create animations that approximate real physics, but
only using 2 or 3 keyframes on a curve. Because so few keyframes are created,
it's easy to hand adjust any animations if needed. Simulation should take
3-5 seconds, so it's easy to undo, make tweaks, and re-simulate. Position
keys are accurate, but the curves themselves are approximations.
Maya Rigid Body Simulation: creates many keys, and takes a while to setup and calculate. Hard to tweak by hand:
FlyApart Tool: 2-3 keys per object-takes around 3-5 seconds. Can undo and redo. Easy to tweak by hand:
FX FlyApart Tool UI:
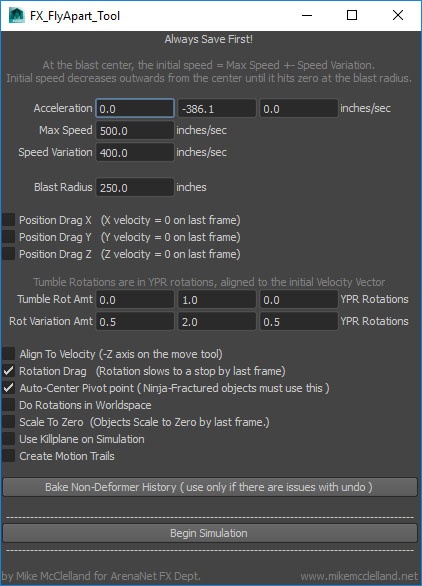
(More detailed explanations of the UI are given towards the bottom of the page)
---------------------------------------------------------------------------------------------------------
The
Basics:
Whatever objects are selected when the script is run will be animated.
The script creates 'blast center' and 'killplane' objects, which can be
moved, depending on how you want the pieces to fly about. All values are
based on position of the object's pivot point- not collision or mass.
Velocities are based on the distance of the pivot point from the blastcenter
object. Objects that are further from the blast center will be slower.
The killplane can also be moved about and rotated-if toggled, objects
won't animate beyond the killplane.
Arrows
show Blast Center Sphere and Killplane object:
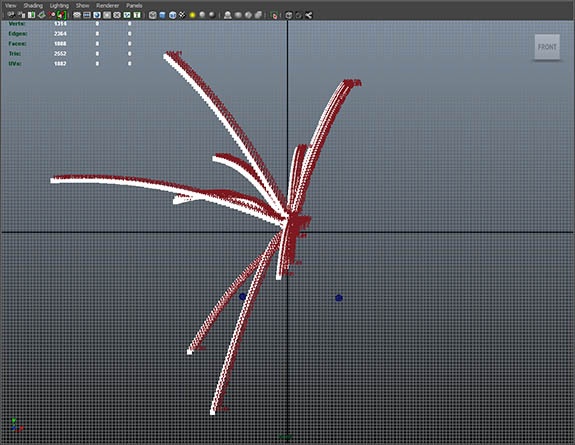
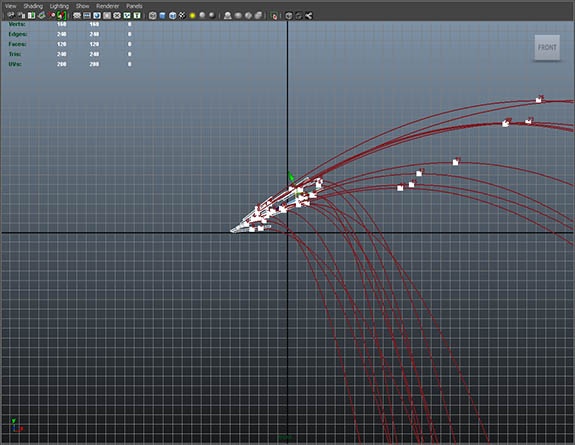
Result of the above blast center position, with Align-To-Velocity turned on:
---------------------------------------------------------------------------------------------------------
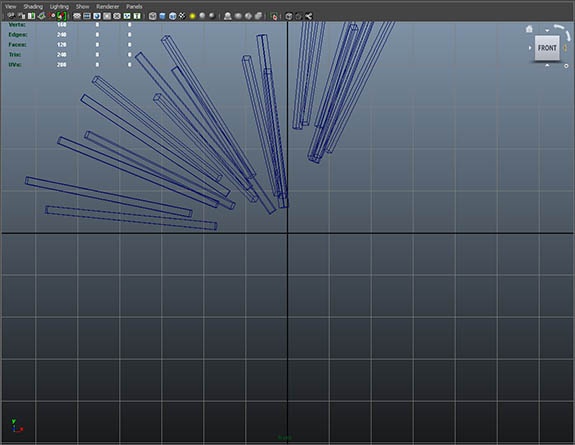
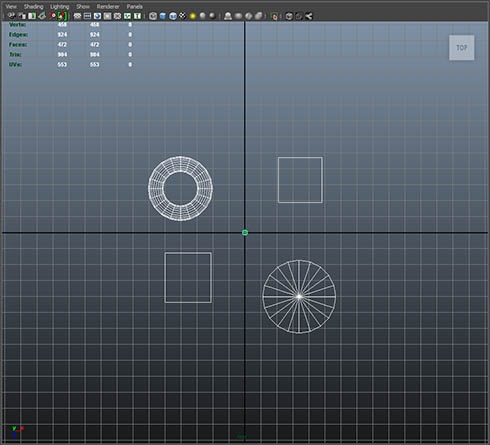
Example of Blast Center positioning:
Blast Center sphere (selected object) positioned before simulation:
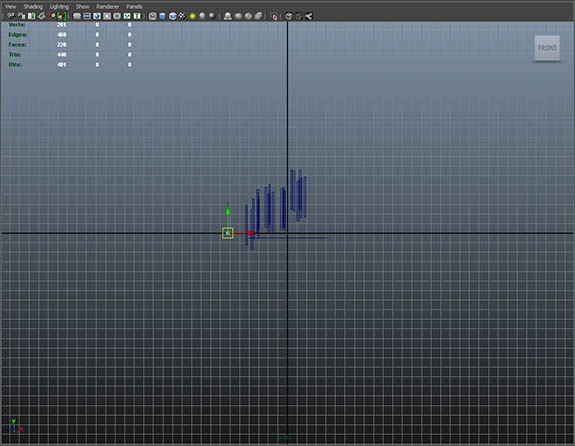
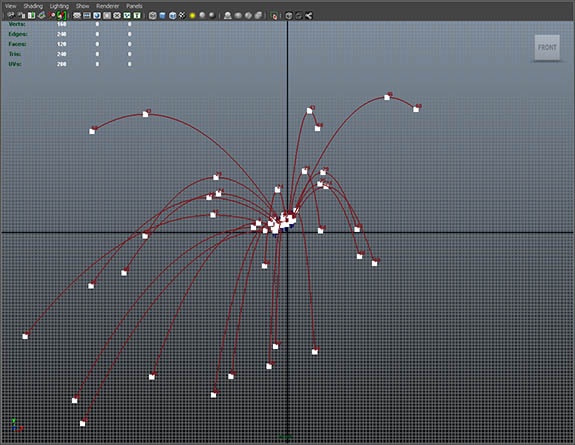
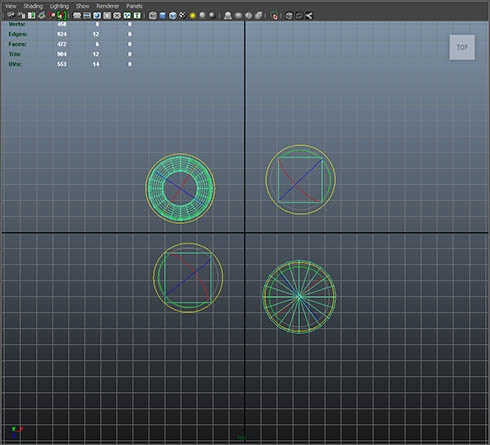
Result of the above blast center position:
Result
of the above blast center position, seen from top:
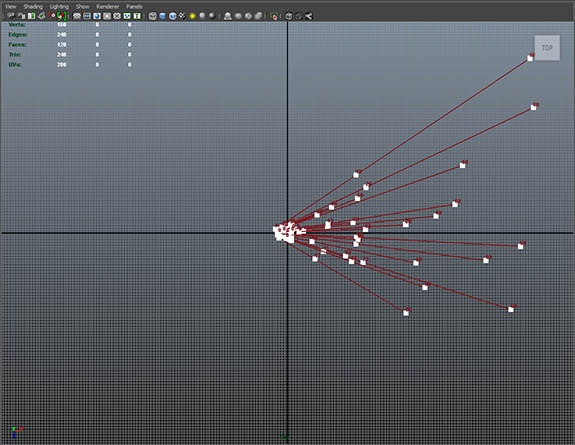
---------------------------------------------------------------------------------------------------------
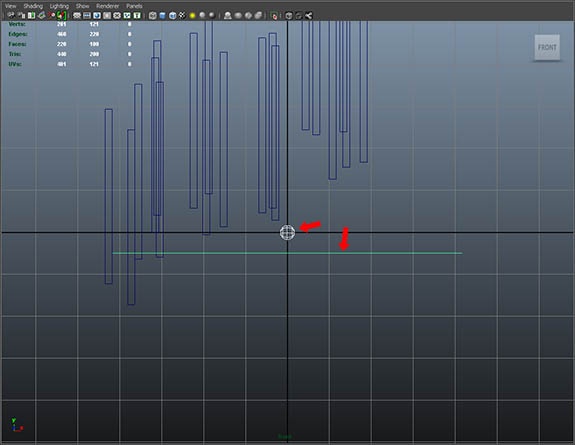
Example of Using Killplane:
Killplane and Blast Center Object positioned before simulation, indicated by arrows:
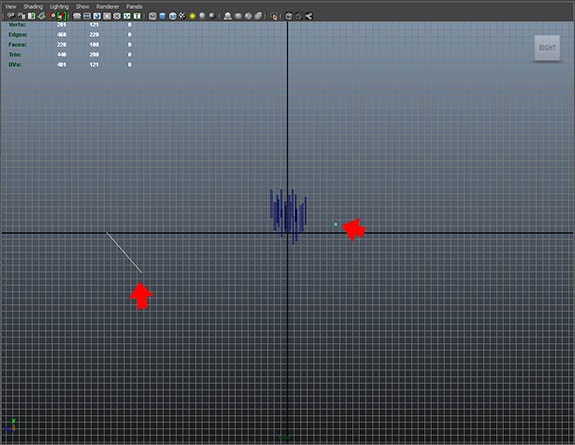
Result of above Killplane and Blast Center Object positions:
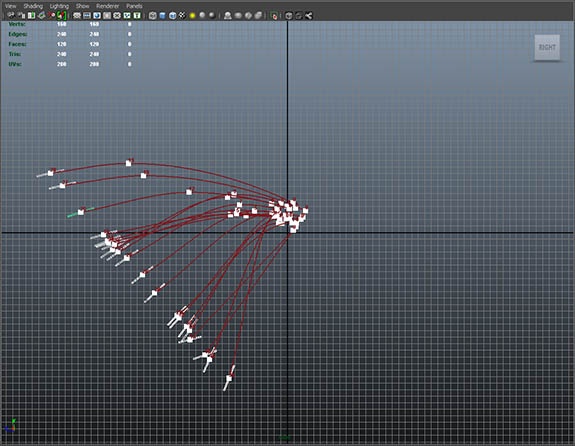
---------------------------------------------------------------------------------------------------------
Quick
Summary of Rotations:
"Align to Velocity" examples are shown in illustrations above.
The "Do Rotations in Worldspace" option means rotations are
in XYZ axis values, based on worldspace. Default rotations setup so the
object's axis is aligned to the initial velocity vector, without actually
rotating the mesh. Values are expressed in YPR aligned to the velocity
vector. This is for ease of animation and to reduce necessary keys. In
general, an object should tumble away from the source of the explosion,
and this makes it easy to do so without a ton of keys. If you need to
animate just one axis, just animate the pitch axis.
Objects with blast center positioned in the middle, before simulation:
After simulation, the Local and Gimbal rotation Axis have been adjusted to align with velocity vector, for ease of animation:
---------------------------------------------------------------------------------------------------------
A More Detailed Explaination of the Tool:
The animations created by this tool are based on an object's real pivot point, and it's position relative to a 'blast center' object. The initial velocity vector, or direction of travel, is a straight line from the object's pivot to the blast center object. The initial velocity at the start of the animation will be based on the distance from the object's pivot to the blast center. If an object is at the center, the velocity should be the "max speed", as shown in the interface below. This initial velocity decreases as the objects initial positions are further from the blast center. If the distance from the center is greater than or equal to the blast radius, the initial velocity will be zero. As the object is animated, the Acceleration values will have an effect on the final positions. Acceleration can be on more than one axis, like gravity and wind both adjusting the velocity at the same time.
.jpg)
Acceleration: These XYZ values are in worldspace, inches per second squared. Default is earth normal. You can add acceleration on other axis to simulate wind, etc.
Max Speed: The highest initial
velocity an object can have, if placed at the blast center.
Speed Variation: a + or - randomize
value to add variety to the initial velocity.
Blast Radius: at this distance
and beyond, an object's initial velocity will be zero.
Position Drag XYZ:
If toggled, the last translate key of the object in the graph editor will
be flat on that particular axis, faking drag to zero velocity.
Tumble Rot Amt:
number of full rotations completed from the start of the animation to
the end. in local YPR or World XYZ depending the "Rotations in Worldspace"
toggle. Pitch is the most important.
Rot Variation Amt: +or
- randomize value. Calculated in full rotations over the length of the
animation.
Align to Velocity: animates an object
such that it aligns to it's trajectory. This will not adjust an object's
axis and pivot.
Rotation Drag: If toggled, the last
Rotate keys of the object in the graph editor will be flat, faking drag.
Auto-Center Pivot Point: this was
added after encountering issues with Fractured objects. All fractured
pieces created in Ninja-Fracture all have exactly the same position, regardless
of the apparent pivot point. This re-centers the mesh based on the center
of the bounding box.
Do Rotations in Worldspace: this will ignore an objects velocity vector
and do all rotations in worldspace, without adjusting the object's axis
and pivot.
Scale to Zero: Scales objects down
over the course of an animation, never actually reaching zero. This is
to make objects go away over time. Useful if objects will be falling through
the playsurface or walls.
Use Killplane on Simulation:
Use if you want objects to stop at a certain point, like arrows hitting
a target. Again, works on pivot point, not on bounding box.
Create Motion Trails: auto-create
Maya's Editable Motion Trails that enable you to edit the position animation
directly in the viewport.
Bake Non-Deformer History: This will
delete the non-deformer history of all the objects. Added when there were
bugs on undo.